In a previous blog I mentioned that Snowflake’s Data Governance Framework focuses on three key areas:
- Know your Data
- Protect your data
- Connect your Ecosystem
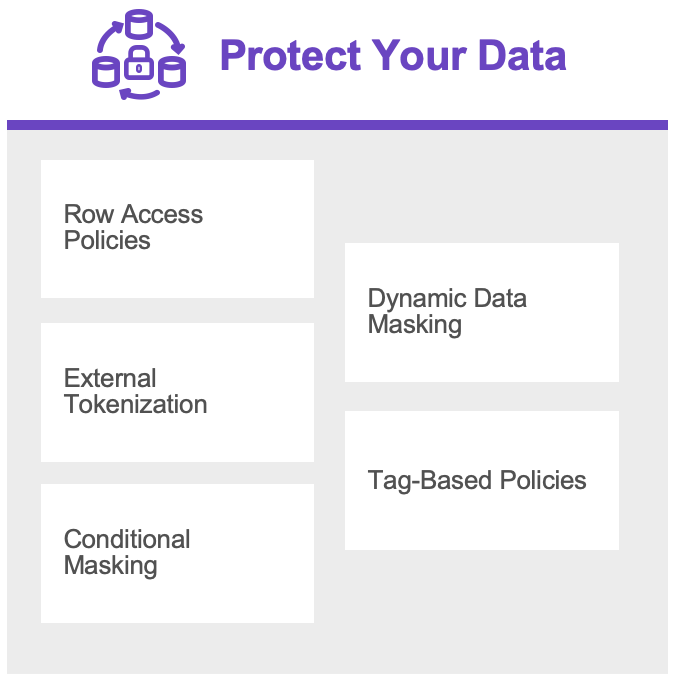
Protect your data
In this blog we will focus on the key area; ‘Protect your Data’.
Data protection is a critical component of Snowflake’s Data Governance Framework. The platform offers advanced security and compliance features to help protect sensitive data from unauthorized access, use, and disclosure. Snowflake also offers granular access controls, data masking, and encryption options to help you protect your data. These features enable you to define and enforce data access policies, monitor data access and usage, and ensure compliance with industry and government regulations.
Row Access Policies
Row Access Policies in Snowflake provide a way to control access to individual rows in a table based on specific conditions or criteria. This allows administrators to implement fine-grained access control over sensitive data, such as customer information or financial data, and ensure that only authorized users can access and modify the data.
Row access policies work by defining a set of rules that determine which rows a user is allowed to access. These rules are defined using SQL expressions that evaluate to either true or false, and can be based on a wide range of criteria, such as user identity, time of day, location, or other attributes of the data.
Once a row access policy has been defined for a table, Snowflake automatically applies the policy to any queries that access the table. For example, if a user attempts to select data from a table that is protected by a row access policy, Snowflake will automatically filter out any rows that the user is not authorized to access, based on the policy rules.
Row access policies can be defined for any table in a Snowflake account, and can be customized to meet the specific needs of different users or groups. For example, a row access policy might be defined to allow managers to access all rows in a table, while restricting access for other users to only those rows that belong to their department or team.
We can setup a Row Access Policy executing the following steps:
- Create a Mapping Table
- Load the Mapping Table
- Create a Row Access Policy
- Apply the Row Access Policy
Mapping Table
First steps are creating a Mapping Table where we can store the allowed values (in this case for a city) for a specific role.
We restrict the TASTY_TEST_ROLE-role to only see ‘Cape Town’ and TASTY_BI-role to only see ‘Barcelona’.
Row Access Policy
Now we can create a Row Access Policy. In this case the Row Access Policy checks whether the currently selected role can see all the data or specific data based on the Mapping Table.
Apply Row Access Policy
Now that the Row Access Policy is created, it only needs to be applied to a table.
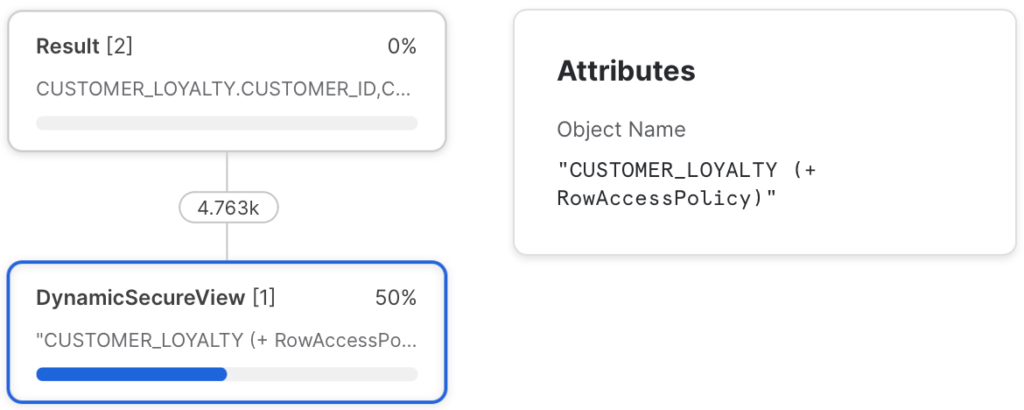
Check Row Access Policy
Now when we query the specific table, you can see that Row Access Policy is applied. Depending on the role one can see nothing, everything or the specific city.
In the Query History, you can lookup the query and examine the Query Profile to see that the Row Access Policy is applied.
Dynamic Data Masking
Snowflake Dynamic Data Masking (DDM) is a feature that allows you to protect sensitive data by dynamically masking or obfuscating certain columns or fields in your database tables or views, based on your specific security requirements. This can help you meet regulatory compliance requirements and prevent unauthorized access to sensitive data.
DDM works by replacing the original data with masked values at the point of query, so that only authorized users can see the unmasked data. This can be done in real time and without affecting the underlying data or the performance of your queries.
Snowflake DDM is an important component of Snowflake’s data protection capabilities, as it allows you to control the visibility of sensitive data at the column level, rather than having to mask entire tables or views. This can be especially useful when dealing with large datasets that contain both sensitive and non-sensitive data, as it allows you to selectively mask only the sensitive data, while leaving the rest of the data untouched.
We can setup Dynamic Masking via the following steps:
- Create a Dynamic Data Masking
- Apply Dynamic Data Masking
Create Dynamic Data Masking
First create a Dynamic Masking Policy. In this case it depends on which role is selected in the session whether you see nothing (‘*********’) of the column, part (in this case only the email domain remains visible) or the complete value in the column.
Apply Dynamic Data Masking
Now that the Dynamic Data Masking Policy is created, it only needs to be applied to a table column.
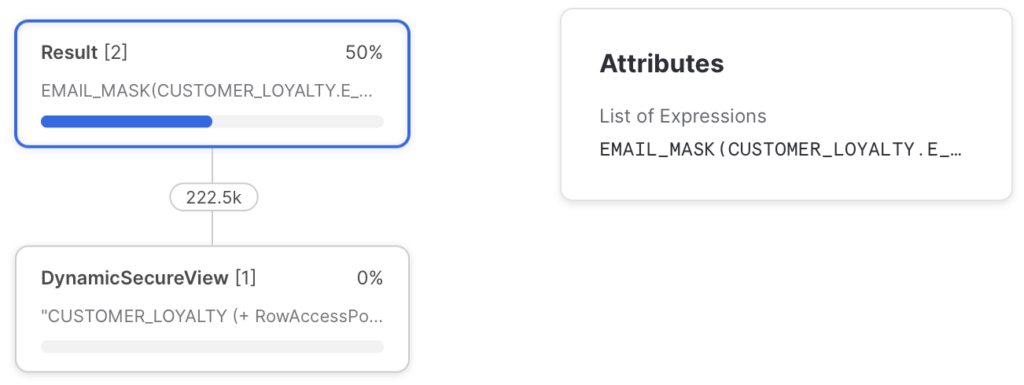
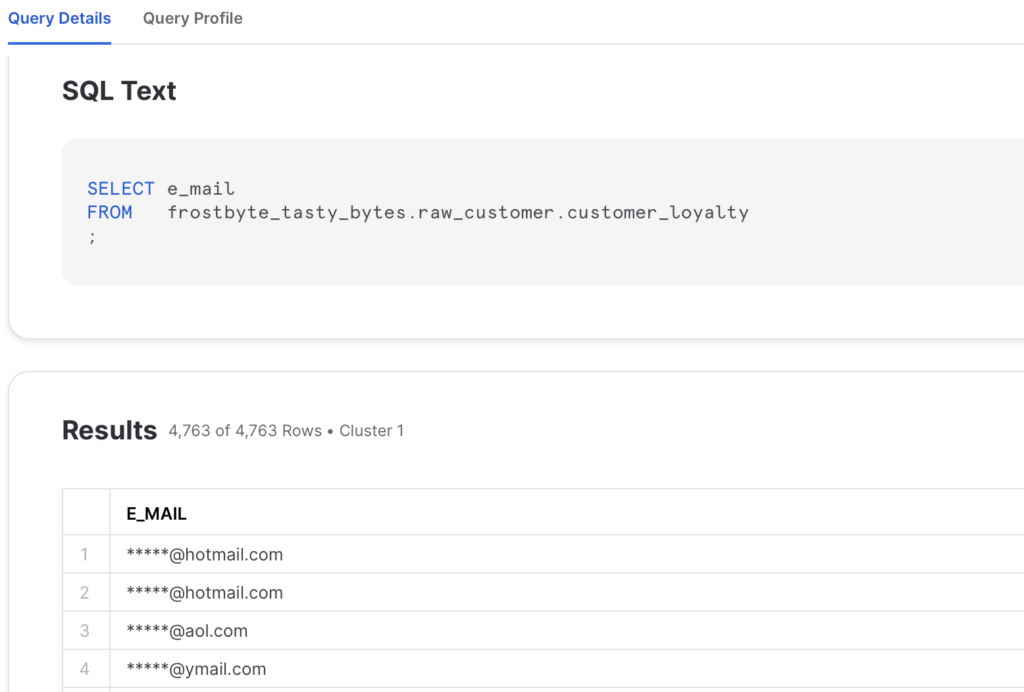
Check Dynamic Data Masking
Now you can query the CUSTOMER_LOYALTY-table and see what happens when you query this table with different roles. Depending on the role one can see different content for the same column.
In the Query History, you can lookup the query and examine the Query Profile to see that next to the Row Access Policy also Dynamic Masking is applied.
External Tokenization
When you use Snowflake External Tokenization, sensitive data is replaced with tokens generated by an external service. Snowflake stores these tokens instead of the original data, and then passes them to the external service for decryption when necessary. This ensures that sensitive data is not stored in its original form within the Snowflake database, which can help to mitigate the risks associated with data breaches and unauthorized access.
Snowflake External Tokenization is an important component of Snowflake’s data protection capabilities, allowing you to easily integrate with external tokenization services to further enhance the security of your sensitive data. You can configure External Tokenization to work with specific columns or fields in your database, and define the tokenization format and length. Additionally, you can monitor and audit tokenization activity using Snowflake’s auditing capabilities.
Overall, Snowflake External Tokenization is a powerful tool for protecting sensitive data and ensuring compliance with data privacy regulations. By integrating with external tokenization services, Snowflake provides a flexible and secure solution for tokenizing sensitive data within your organization.
Setting up External Tokenization is an whole blogpost in itself which I will not cover here.
Tag-Based Masking
Snowflake Tag-Based Masking is a feature that combines object tagging and masking policy to allow a masking policy to be set on a tag using an ALTER TAG command. It provides an additional layer of data protection by allowing users to mask column data based on the tag name or tag value assigned to the column.
Tag-Based Masking Policies work by automatically protecting the tagged column when the data type in the masking policy signature and the data type of the column match.These policies can be written to protect the column data based on the policy assigned to the tag or based on the tag itself.
When a column references both a masking policy and a tag-based masking policy, the masking policy that is directly assigned to the column takes precedence over the tag-based masking policy. The tag can support one masking policy for each that Snowflake supports, which simplifies the initial column data protection efforts.
Tag-Based Masking Policies are an essential component of Snowflake’s Data Governance framework because they help protect sensitive data by obscuring or hiding column values at loading. This is done by dynamically rewriting the query applying the masking policy SQL expression to the column.
Apply Tag Based Masking
For this example we unset the Dynamic Data Masking policy on the EMAIL-column we applied earlier in this post. We will use this Dynamic Data Masking policy in combination with the Object Tag we created in an earlier post.
Again you can query the CUSTOMER_LOYALTY-table and see what happens when you query this table with different roles. Depending on the role one can see different content for the same column.
Conditional Masking
Snowflake Conditional Masking Policies are a feature of Snowflake’s Column-level Security that selectively protect the column data in a table or view based on the values in one or more different columns. These policies use a masking policy to determine whether the policy conditions should mask or tokenize the data in the first column based on the conditional columns and their data types.
Conditional Masking Policies are useful for protecting sensitive data by obscuring or hiding column values based on specific conditions. They can be used in conjunction with other Column-level Security features, such as Dynamic Data Masking and Tag-Based Masking Policies, to provide an additional layer of data protection.
Create Conditional Data Masking
To use Conditional Masking Policies, users must first create a masking policy with the CREATE MASKING POLICY command and specify the conditional columns and their data types to evaluate.
Applying and verifying whether the Conditional Data Masking works is a similar process compared to Dynamic Data Masking as covered earlier in this post.
Till next time.
Director Data & AI at Pong and Snowflake Data Superhero. Online better known as; DaAnalytics.